HotSpot Section Management
Wi-Fi HotSpot is a system that provides public internet access after user authorization and identification via a phone number or SMS.
User Authorization Process:
- The user (not yet a subscriber) connects to the public Wi-Fi hotspot.
- The DHCP server assigns them an internal IP address, and the system triggers internet blocking through the "Whitelist" service, which restricts access to everything except the authorization page. Connection speed limitations are also applied.
- The client's device automatically redirects to the authorization page, where they need to enter their phone number and choose a verification method — via SMS or a call to the provided number.
- After authorization, depending on the agreement terms, the system removes the restrictive policing and the "Whitelist" service.
If DPI is used, a subscriber profile is created with a login (phone number) and assigned IP. The profile becomes active, granting the subscriber internet access with the necessary policies and services. When the "Session Lifetime" parameter expires, deauthorization occurs. DPI removes all services and policing, deletes the "login-IP" link, and reactivates the "Whitelist" service with access restrictions, requiring the subscriber to reauthorize.
If a billing system is used, it receives a request with the IP and phone number, then applies settings according to the billing parameters and timeouts.
WiFi HotSpot configuration is carried out in the GUI section SSG Control → HotSpot.
The section contains tabs:

Common Settings
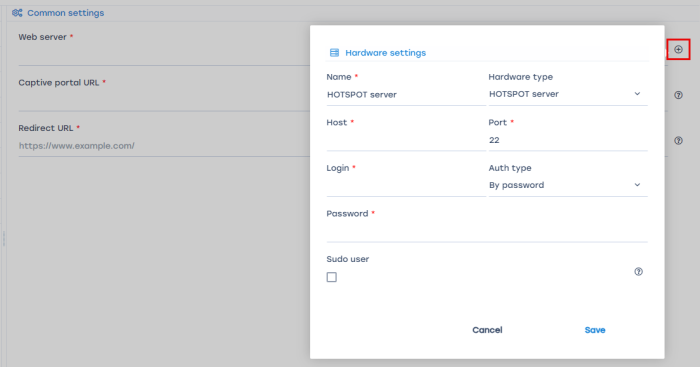
- In the "Web Server" parameter, select the HOTSPOT server linked to DPI.
If the corresponding equipment is not available, add it using the "Add New Device" button. A form for creating a new device will appear; in it, create a device with the "HOTSPOT server" type.
More about creating equipment.

- In the "Captive portal URL" parameter, specify the URL to which the subscriber will be redirected for network authorization. Creates/updates the Whitelist service profile with the entered URL. The profile name is
hotspot_white_list_profile. - In the "Redirect URL" parameter, specify the URL to which the subscriber will be redirected after successful authorization on the HotSpot portal. If the field is empty, the subscriber is redirected to https://google.com.
View Settings
In this section, you can change the favicon and logo displayed on the portal page.

Localization Settings
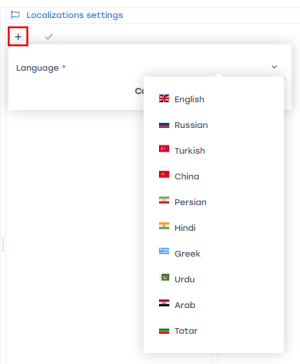
- Add a language for localization settings by clicking +. Available languages list:

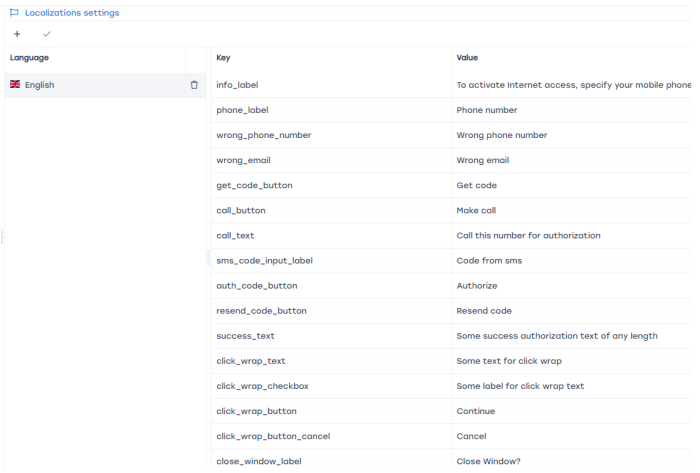
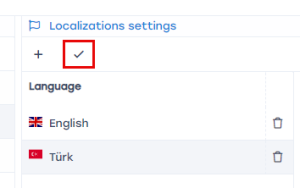
- Select the added language to configure parameter values. Change values by clicking on them.

- Any language can be set as the default by clicking the “Set as Default” button. By default, the first added language is set as the default.

If two or more languages are configured, the authorization page will have a button to select the language.
Auth and Click-Wrap Settings
WiFi Authorization Settings
Wi-Fi authorization is the process of connecting to a network with user identification via a phone number or SMS.
To configure this type of authorization, select “Yes” for the “WiFi authorization enabled” parameter. All WiFi authorization settings will then appear:
- “Session management enabled”
If “Yes” is selected, subscriber creation and management (authorization and deauthorization) occur through DPI, allowing for “Session lifetime” configuration (After the session lifetime expires, HotSpot will execute a script to delete the subscriber from DPI and apply the authorization tariff and the Whitelist service to their IP address).
If “No” is selected, subscriber management occurs via the billing system or another third-party service. Here, you need to configure an HTTP request sent to the billing API, which will apply and remove the appropriate policies for the subscriber. - “Authorization type” Two options are available:
- “By auth code” — for this option, you need to configure HTTP requests to the service for sending SMS and calls.
You can also enable the “Sequential Authorization” parameter — this mode allows you to select the initial authorization method, and the “Debug Mode” — enables sending the authorization code to the email specified in the phone number field to test the subscriber authorization scenarios. - “By outgoing call” — for this option, configure two parameters:
- “Outgoing call phones list” — enter phone numbers separated by commas. HotSpot will randomly select a phone number to authorize the subscriber by an outgoing call.
- “Secret key for hash generating” — configure the call service to send an HTTP request about receiving an outgoing call from the subscriber to HotSpot. A hint on setting up the HotSpot API method for receiving the signal and creating a hash is available by clicking the question mark icon next to the parameter.
Click-Wrap Settings
Click-wrap displays the text of a public offer that subscribers must agree to in order to use the services.
To configure this type of authorization, select “Yes” for the “Click wrap enabled” parameter. Click-wrap settings will then appear:
- “Session management enabled”
If “Yes” is selected, subscriber creation and management (authorization and deauthorization) occur through DPI, allowing for “Session lifetime” configuration (After the session lifetime expires, HotSpot will execute a script to delete the subscriber from DPI and apply the authorization tariff and Captive Portal service to their IP address).
If “No” is selected, subscriber management occurs via the billing system or another third-party service. Here, you need to create an HTTP request sent to the billing API, which will apply and remove the appropriate policies for the subscriber.
The click-wrap text is configured in the “Localization Settings” section under parameters prefixed with “click_wrap”:

Services Settings
This form provides settings for services available to subscribers after they authorize on the portal.

The following services are available for connection:
- 2. Advertising — no profile
- 3. Ad Blocking — no profile
- 4. Blacklist — with or without a profile
- 11. CGNAT — profile selection required
- 50. Notification — no profile
Tariffs Settings
This form allows configuring tariff plan parameters applicable to subscribers during Wi-Fi authorization. The tariffs in the form correspond to the following names on the DPI:
- Authorization Policing — applied at the moment of network authorization. Corresponds to the named profile
wifi_hotspot_auth_policingon the DPI. - Wi-Fi Policing — applied after successful authorization. Corresponds to the named profile
wifi_hotspot_policingon the DPI. It is assigned to the subscriber after completing authorization on the portal.

DHCP configuration
Supplementary information for connecting the DHCP server:
- Configure remote ssh commands
- Set up on the trigger for issuing a new IP:
For Wi-Fi authorization use this trigger:
ssh dpi_user@dpi_host "/var/dpiui2/add_captive_portal_auth.sh <IP>"
If you need only click-wrap function use this trigger:
ssh dpi_user@dpi_host "/var/dpiui2/add_captive_portal_click_wrap.sh <IP>"
Logs
This subsection contains log files for the interface and Click-Wrap feature.
To update the list, click the "Refresh" button.
Configuration Management

- Save configuration
- Refresh configuration
- Navigate to the documentation page for the HotSpot section
- Delete configuration
Was this information helpful?


