Содержание
VEOS installation and configuration
1. Requirements for VEOS installation
1.1. Hardware requirements
Before mounting the server into the rack, make sure it meets the required specifications:
 If any discrepancies are identified at this stage, contact VAS Experts technical support for a prompt resolution.
1.2. Disk partitioning requirements
Disk partitioning for SSG software:
- ~20 GB for the root partition.
- Allocate the remaining space to the
/vardirectory. - SSG does not use a SWAP partition directly, but it is required for system tasks. Allocate 4 GB for it.
Use the GPT partition table type.
2. Preparing for VEOS installation
2.1. Server preparation
- Disable Hyper-threading in BIOS for SSG software!
- Configure the server for maximum performance
2.2. Creating bootable media
ISO links
- VEOS 8.10 Olkhon (SHA-256 checksum) for minimal installation
Method 1. Preparing a bootable USB drive
The most common way to install an operating system today is using a bootable USB drive.
Writing a USB drive on Linux
To create a bootable USB drive on Linux/Unix, run the dd command:
> dd if=VEOS-8.7-x86_64-Minimal.iso of=/dev/sdz bs=1M
When writing the image, specify the entire disk, not a partition on it (i.e. /dev/sdz, not /dev/sdz1)
Writing a USB drive on Windows
1. Rufus
To write the ISO image to a USB drive on Windows, you can use Rufus, making sure to select the "DD Image mode":
- Rufus main screen

- write mode selection dialog


2. Diskdupe (dd) for Windows
The command parameters are the same as on Linux. The DD distribution for Windows can be downloaded here.
When using dd for Windows, first run dd –list and carefully review the list of NT block devices. Select a device similar to \\?\Device\Harddisk1\Partition0 with a description like "Removable media other than floppy. Block size = 512". Be careful when selecting the device, otherwise you may corrupt data on other disks!
Method 2. Preparing an installation disk
The traditional way to install an operating system is using an installation DVD.
Burning a disk image on MS Windows (using Small CD-Writer)
An ISO disk image file is a specially formatted file prepared for burning to a disk. To burn an ISO image on MS Windows, use dedicated software such as SCDWriter, Nero BurningROM, balenaEtcher, and others.
The entire process of creating an installation disk using Small CD-Writer consists of the following steps:
- Download the distribution image;
- Download the Small CD-Writer archive;
- Extract the program files from the archive into any directory;
- Insert a blank disk into the drive;
- Open the extracted directory and run SCDWriter.exe;
- Open the menu item Disk → Burn ISO Image to Disk and specify the path to the disk image in the dialog window;
- Click the Burn button.
Burning a disk image on Linux (using K3b)
It is recommended to use K3b or Brasero for burning ISO images, as these programs are included in most Linux distributions.
The entire process of creating an installation disk using K3b consists of the following steps:
- if the k3b program is not installed, install it using the standard package management tools of your distribution;
- launch the k3b program. If the system is configured correctly, the program will report that there are no issues and offer to proceed with burning the disk;
- in the main window menu, select Service → Burn DVD Image;
- in the Burn DVD Image window, click the button to select the file for burning. A dialog will open where you need to choose the ISO image and click OK;
- k3b will display information about the ISO file and begin calculating the checksum. This may take several minutes. The resulting checksum can be compared with the MD5SUM value on the distribution page;
- if the checksums do not match, either the wrong file was selected or the downloaded ISO image was corrupted during transfer;
- if the checksums match, insert a writable disk into the drive and wait for the Start button to become active;
- click the Start button.
3. Installation process
3.1. Booting from media and startup menu
To boot the computer for system installation, use media containing the VEOS distribution.
After successful hardware initialization, the bootloader menu with installation options is displayed:
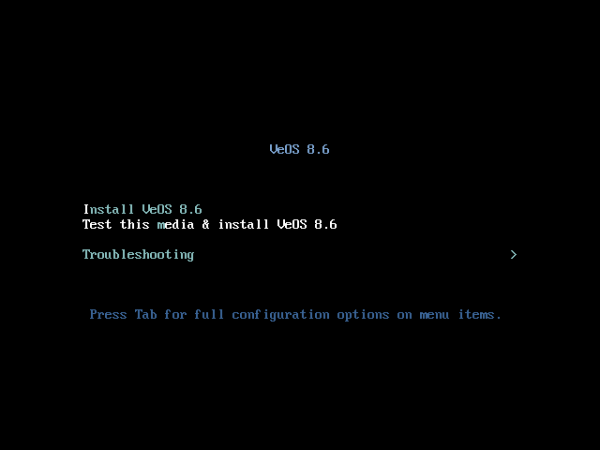
Selecting the standard installation option launches the graphical installer interface. The installation process is divided into steps. Each step is dedicated to configuring or installing a specific system property. The steps must be completed sequentially. Proceed to the next step by clicking the Next button. If necessary, use the Back button to return to a previous step and modify settings.
Technical information about the installation process (log file) can be viewed by pressing Ctrl+Alt+F1, and you can return to the graphical installer using Ctrl+Alt+F7. Pressing Ctrl+Alt+F2 opens the debug virtual console. Each step includes a short help section available by clicking the Help button or pressing F1. The installation process consists of the following steps:
- Selecting the installation interface language
- Configuring OS installation parameters — keyboard layout, language support, date and time zone settings, disk partition preparation, network configuration, security policy configuration, and administrator account creation
- Installing the system onto the selected disk
- Completing the installation and rebooting
3.2. Verifying successful installation
You can verify the installation in two ways:
- Check the VEOS version:
cat /etc/system-release
- Download any test package from the repository
4. Providing access for further configuration
If you received a preconfigured system from us, proceed directly to the Installation guide section.
Otherwise, you need to install the VEOS operating system on your server yourself and provide us with remote SSH access and root privileges so we can perform installation and initial platform configuration.
After the work is completed, remote access can be disabled.
- Create the vasexpertsmnt user:
adduser -m -G wheel -u 3333 vasexpertsmnt
- Set a strong password for the vasexpertsmnt user:
passwd vasexpertsmnt
For convenience, you can generate a password using openssl:
openssl rand -base64 15
- Save the password for vasexpertsmnt.
- Allow users from the wheel group to execute all commands as any user by adding the following line to /etc/sudoers:
%wheel ALL=(ALL) NOPASSWD: ALL
- To provide remote SSH access and restrict access to the following IP addresses:
45.151.108.0/23, 94.140.198.64/27, 193.218.143.187, 93.100.73.160, 78.140.234.98, 93.159.236.11, 46.243.181.35, 46.243.181.242
	iptables -A INPUT -m conntrack --ctstate RELATED,ESTABLISHED -j ACCEPT
	iptables -A INPUT -p tcp -s 45.151.108.0/23 -m tcp --dport 22 -j ACCEPT
	iptables -A INPUT -p tcp -s 94.140.198.64/27 -m tcp --dport 22 -j ACCEPT
	iptables -A INPUT -p tcp -s 193.218.143.187 -m tcp --dport 22 -j ACCEPT
	iptables -A INPUT -p tcp -s 93.100.73.160 -m tcp --dport 22 -j ACCEPT
	iptables -A INPUT -p tcp -s 78.140.234.98 -m tcp --dport 22 -j ACCEPT
	iptables -A INPUT -p tcp -s 93.159.236.11 -m tcp --dport 22 -j ACCEPT
	iptables -A INPUT -p tcp -s 46.243.181.35 -m tcp --dport 22 -j ACCEPT
	iptables -A INPUT -p tcp -s 46.243.181.242 -m tcp --dport 22 -j ACCEPT
	iptables -A INPUT -p tcp --dport 22 -j DROP
	service iptables save
If you use firewalld:
	firewall-cmd --permanent --zone=public --add-rich-rule='rule family="ipv4" source address="45.151.108.0/23" service name="ssh" accept'
	firewall-cmd --permanent --zone=public --add-rich-rule='rule family="ipv4" source address="94.140.198.64/27" service name="ssh" accept'
	firewall-cmd --permanent --zone=public --add-rich-rule='rule family="ipv4" source address="193.218.143.187" service name="ssh" accept'
	firewall-cmd --permanent --zone=public --add-rich-rule='rule family="ipv4" source address="93.100.73.160" service name="ssh" accept'
	firewall-cmd --permanent --zone=public --add-rich-rule='rule family="ipv4" source address="78.140.234.98" service name="ssh" accept'
	firewall-cmd --permanent --zone=public --add-rich-rule='rule family="ipv4" source address="93.159.236.11" service name="ssh" accept'
	firewall-cmd --permanent --zone=public --add-rich-rule='rule family="ipv4" source address="46.243.181.35" service name="ssh" accept'
	firewall-cmd --permanent --zone=public --add-rich-rule='rule family="ipv4" source address="46.243.181.242" service name="ssh" accept'
	firewall-cmd --zone=public --remove-service=ssh --permanent
	firewall-cmd --reload
!Save your settings, since the server will be rebooted during installation!
After confirming that remote SSH access is available, contact VAS Experts technical support (Service Desk) and create a request for SSG license installation, specifying the SSH username and password.
5. Updating VEOS
To update VEOS, install the new version according to the standard installation process.
6. Troubleshooting
6.1. VEOS does not start after installation
Boot issues can be caused by various reasons, from BIOS/UEFI settings to missing drivers.
- Analyze the error messages displayed during boot.
- The most common causes:
- Secure Boot is enabled — disable it in UEFI settings.
- Incorrect boot order — make sure the disk with VEOS is first in the boot device list.
- GRUB bootloader is corrupted — boot into Rescue mode from the installation media and restore it.
- Missing drivers (kernel panic) — use a DUD ISO with the inst.dd boot parameter.
- If the cause is unclear, contact VAS Experts technical support and attach a screenshot or the error text.
6.2. The installer does not detect the hard drive
In most cases, the issue is related to hardware or the disk controller operating mode.
- Check the physical disk connection: cables, ports, and power.
- Check the SATA controller mode in BIOS/UEFI — switch between AHCI and RAID and try both options.
- If the disk is connected to a RAID or HBA controller, there may be no built-in driver available — use a DUD ISO (see section 2.2.1).
- To rule out disk failure, test the drive on another server.
6.3. Network issues after installation
If network connectivity is unavailable after booting VEOS, first check whether NetworkManager is running.
- Check the NetworkManager status:
systemctl status NetworkManager
- If the service is disabled or not running, enable it:
systemctl enable NetworkManager
systemctl start NetworkManager
- If NetworkManager is running but the network still does not work, check the interface settings (DHCP or static IP), default gateway, and DNS.